To make a still life, there are 5 key skills:
- Move 3d objects around the scene (see Let’s learn the interface)
- Import 3d objects
- Move camera around the scene
- Change the material (the color and shininess) of an object
- Change the lighting
Import a 3d object into the scene
- Download a 3d model from somewhere online.
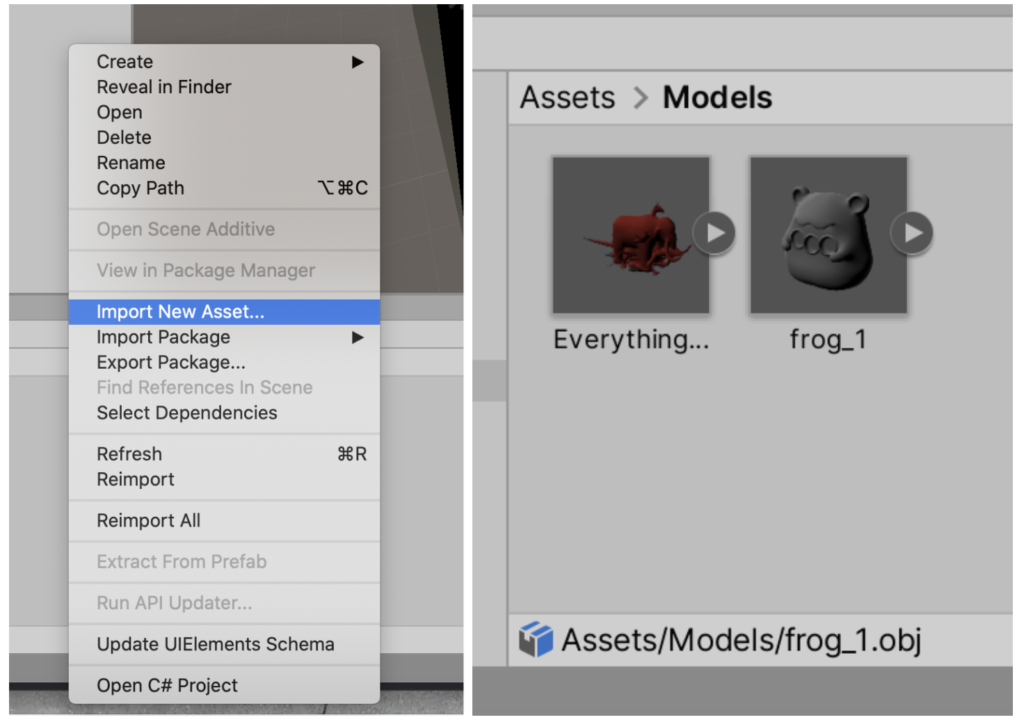
- With a project open, in the Project window, right click and select “Import new asset” and select a 3d model with an .OBJ file or .FBX file. Alternatively, you can drag and drop it into Unity.
- It’s good practice to make a new folder within the Assets folder called for 3d models.
- It’s good practice to make a new folder within the Assets folder called for 3d models.
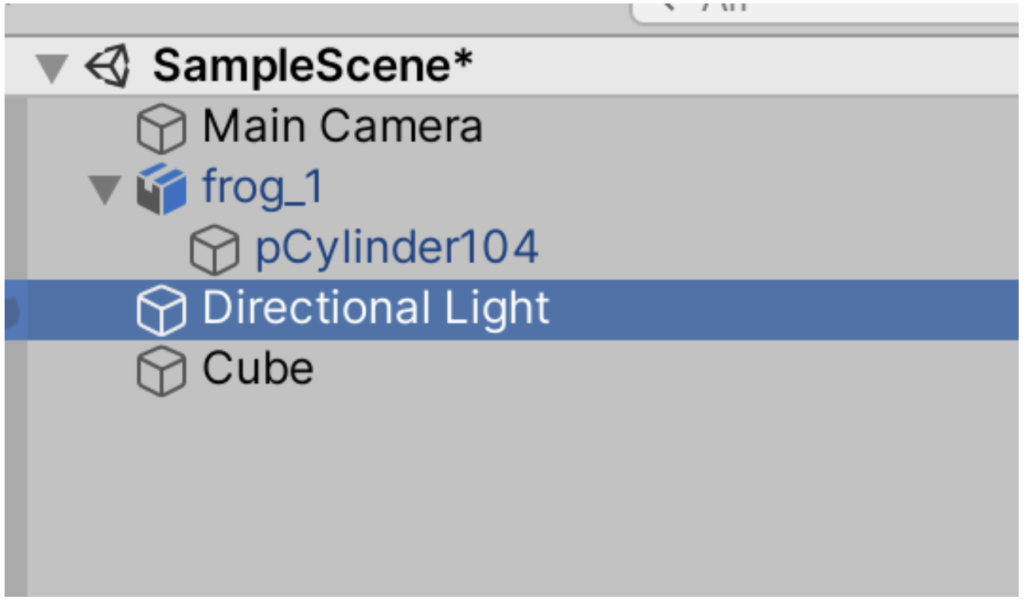
- Drag the imported item from the Project window into the Scene, or the Hierarchy. It should appear in the scene. If you don’t see it, it might be too small or out of the viewbox – double click on the item in the hierarchy to center it in view.
- And that’s it! You’ve imported a 3d model!
Move the camera around
- The camera is what (you) the player views the final game through. Think of the game as an interactive video that the player sees, and thus their point of view is always through the camera.
- Double click on the Camera object in the hierarchy
- You can use the translate and rotate tool to change the position of the camera, and what direction it points in
- See a preview in the bottom right of the scene.

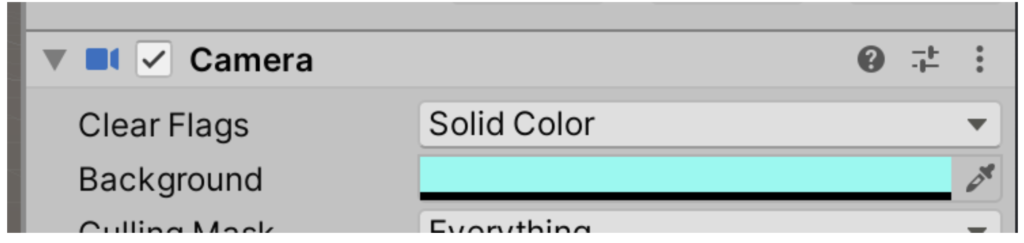
- Tip! You can change the background of the camera from the default skybox to a solid color by playing around with the camera settings on the right:
Change the materials
- It’s a good idea to make a new folder called Materials in the Assets folder to keep your materials.
- A material is like a color that you can assign to a 3d object, only it’s so much more! It can also contain variables like shininess, bumpiness, transparency, and more. Once you make a material in Unity, it’s not automatically assigned to anything, It’s more like a swatch of color (or fabric, if it’s easier to think of them that way) that you can drag to a 3d object. Once you drag and drop it, it’ll adopt that color.
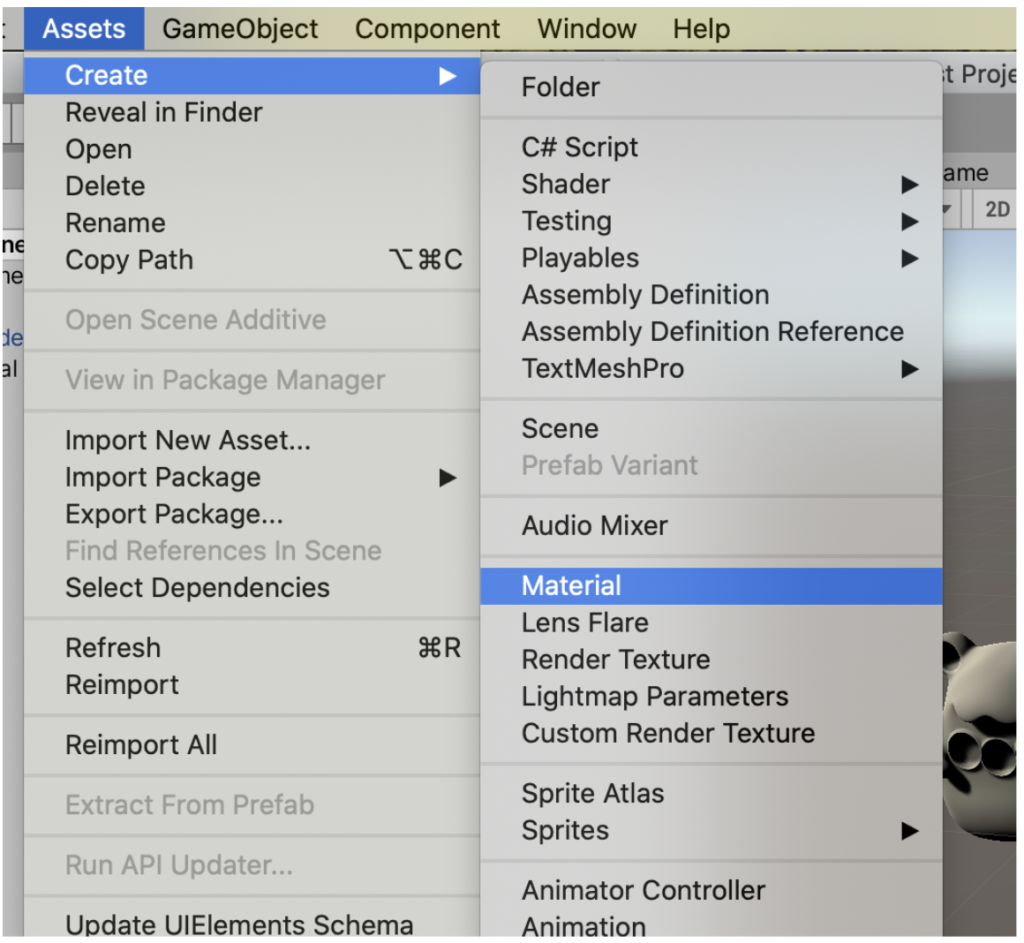
- In the top bar, you can do Assets -> Create -> Material.
- Once you have a material, you can play around with the settings in the Inspector window (usually on the right side of the interface)
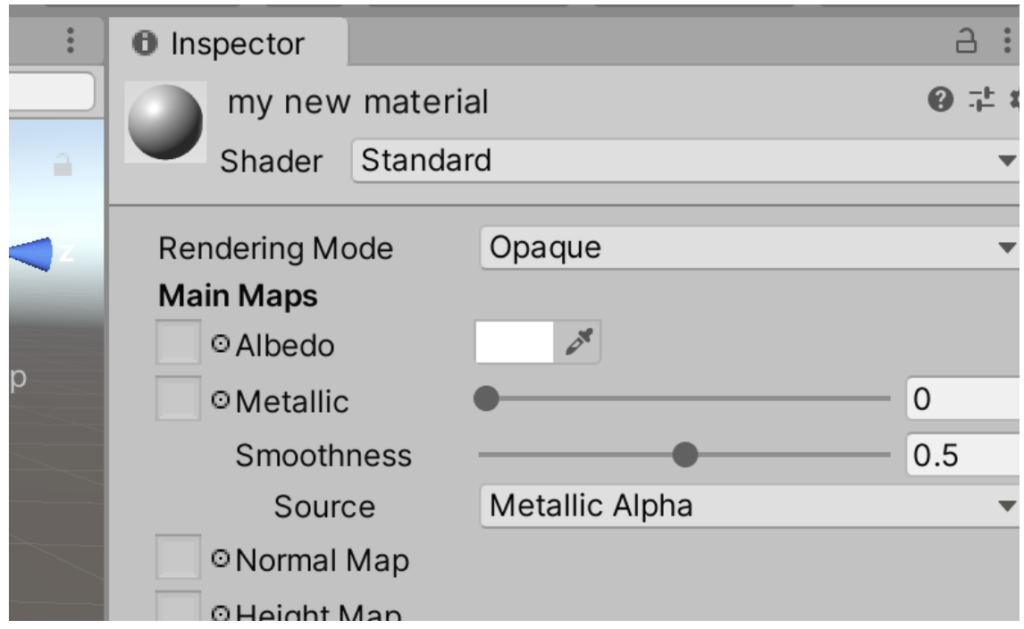
- The easiest thing to change is to change the Albedo of the material – that’s (effectively) the color. If you click on the blank grey box to the left, you can also assign any images that you import instead of using a solid color.
- Materials can be transparent if you change the rendering mode!
- Once you have a material, drag and drop it onto a 3d object in the scene
Change the lighting
- Like any real-life environment, objects need light for the camera to be able to find them. Unity scenes start off with a directional light already!
- You can edit the light properties on the Inspector panel to the right – try changing the intensity to see how that changes the 3d objects in the scene.
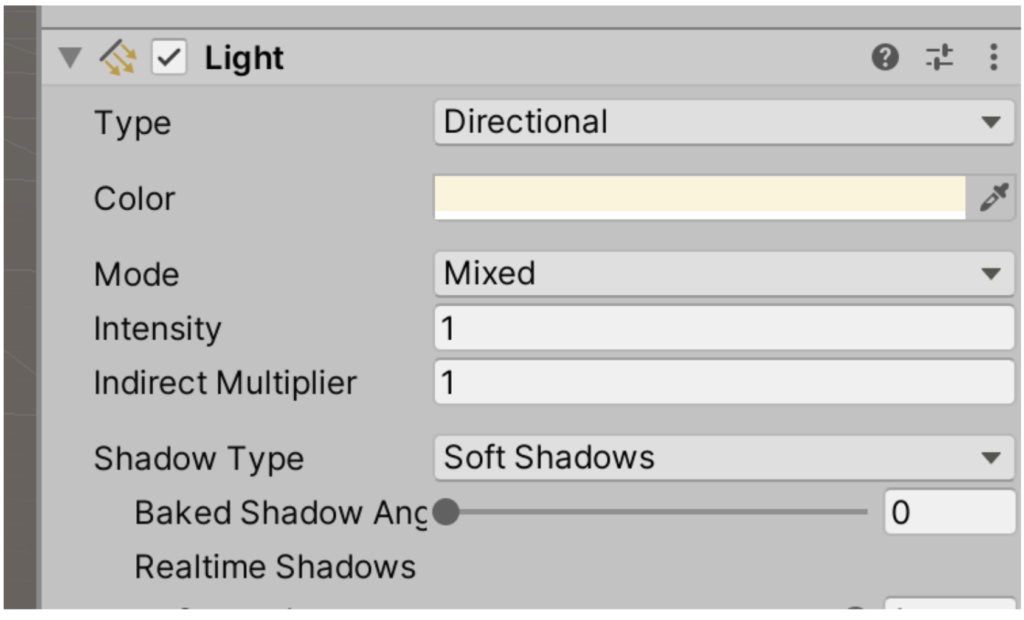
- Since it’s a directional light, changing the position of the light source also changes how the objects are lit.
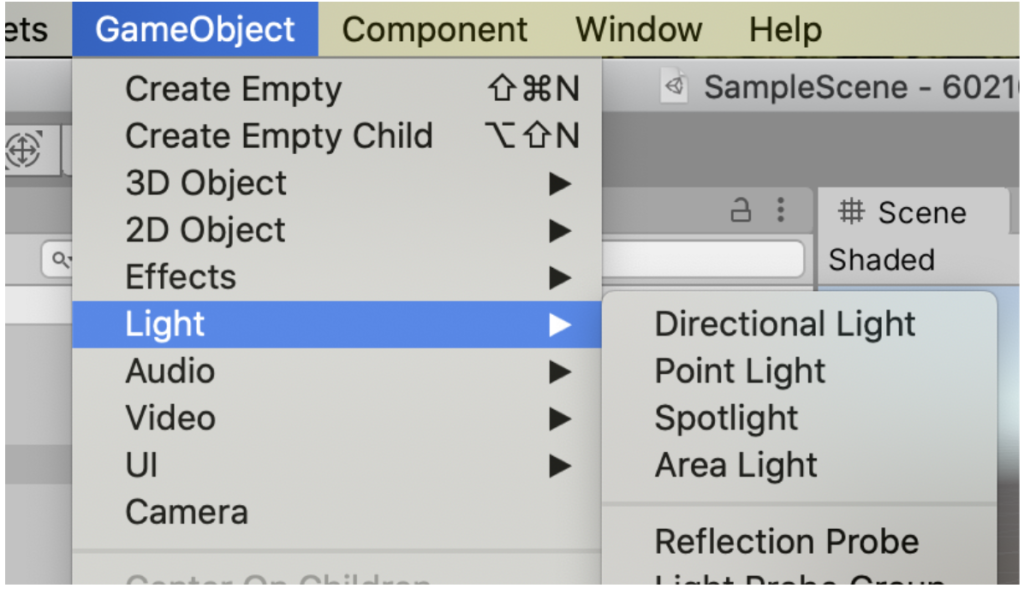
- You can add more lights with GameObject -> Light.
Positioning Objects:
Selecting something: Click on it in the Hierarchy or Scene view. To select multiple things, hold shift. If selected, the object will be outlined.
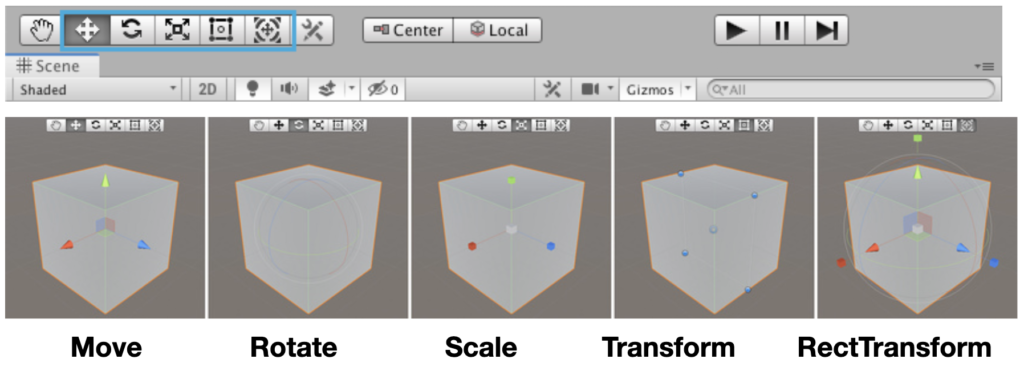
(These are all called “Gizmos”)
Move: With move you can drag on the arrows to move along one axis, on the small squares inside to move on a single plane, or on the cube to move freely.
Rotate: With the Rotate tool selected, change the GameObject’s rotation by clicking and dragging the axes of the wireframe sphere that appears.
Scale: The Scale tool lets you rescale the GameObject evenly on all axes at once by clicking and dragging on the cube at the center of the Gizmo. You can also scale the axes individually, (but you should take care if you do this when there are child GameObjects, because the effect can look quite strange).
Transform: The Transform tool combines the Move, Rotate and Scale tools.

RectTransform: The RectTransform is used for positioning 2D elements, but it can also be useful for manipulating 3D GameObjects. It also combines moving, scaling and rotation.
Position Toggles: The position toggles change where the Gizmos appear.
-
- Pivot positions the Gizmo at the actual pivot point of a Mesh.
- Center positions the Gizmo at the center of the GameObject’s rendered bounds.
- Local keeps the Gizmo’s rotation relative to the GameObject’s.
- Global clamps the Gizmo to world space orientation.
Screen Space Transform: While using the Transform tool, hold down the Shift key to enable Screen Space mode. This mode allows you to move, rotate and scale GameObjects as they appear on the screen, rather than in the Scene.
Game Objects and components
Every object in your game is a GameObject, from characters and collectible items to lights, cameras and special effects. However, a GameObject can’t do anything on its own; you give it properties that make it a character, environment, special effect, etc.
You add these properties with components. Components change how your game object works, acts, and looks.
Game objects don’t really do anything by themselves, but are containers for components. This is a bit confusing, as we will be able to “make a light” in the Unity editor. But in fact what we are doing is making a game object and attaching a “light” component to it- it just does those two steps for us at once.
This is important because we can stack lots of different components up to get objects that function in specific ways!
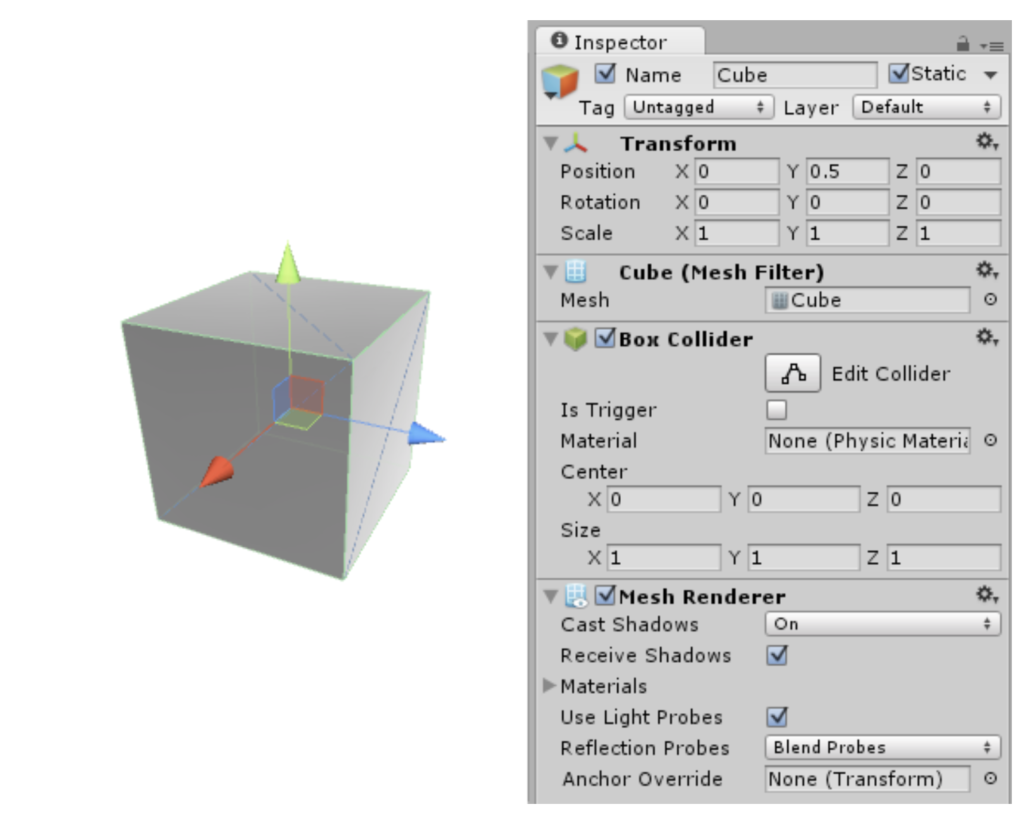
Transform Component: All Game Objects have this. It describes where the object is, and it’s rotation and scale. (“Children” to this game object also take that transform as their 0,0 position.)
You can add a component by hitting the “Add Component” button in the inspector, or in the Component window. There are a ton of different components and we’ll be talking about them individually as we learn the program!
For now, you can try adding a “rigidbody” which implements simple gravity on the object.
You’ll see that there are properties and values that you can edit on the rigidbody component, which will change how it behaves when we press play. (Remember, if you change these when the game is playing they will not save.)
Some Free 3D Models & Other Resources:
- http://www.davidoreilly.com/library
- https://www.turbosquid.com/
- https://free3d.com/3d-models/fbx
- https://3dwarehouse.sketchup.com/search/?searchTab=model
- https://sketchfab.com/
- https://opengameart.org/
- https://www.mixamo.com/#/
- https://texturehaven.com/textures/